Step by step Guide to propagating trailing indoor plants
When you purchase through links on our site, we may earn an affiliate commission, which helps sustain our blog!
If you’ve ever stared at your leggy pothos or trailing philodendron and thought, “Could I make more of you?”—you’re not alone! Propagating trailing houseplants is one of the easiest, most satisfying ways to multiply your plant collection without spending a dime. And the best part? Most vines are eager to root with just a little water, right soil and food, and patience.
In this guide, we’ll walk you through how to propagate trailing houseplants, step-by-step, with plant-specific tips, method breakdowns, and aftercare essentials. Whether you’re rooting cuttings in water or dividing at the node, we’ve got your propagation journey covered!
Best Trailing Houseplants to Propagate
These are some of the best trailing plants we have learnt to propagate
- Pothos (Epipremnum aureum)
- Philodendron hederaceum (Heartleaf, Brasil, Micans)
- Tradescantia zebrina and Nanouk
- String of Hearts (Ceropegia woodii)
- String of Pearls (Senecio rowleyanus)
- English Ivy
- Hoya linearis and carnosa
- Peperomia Hope
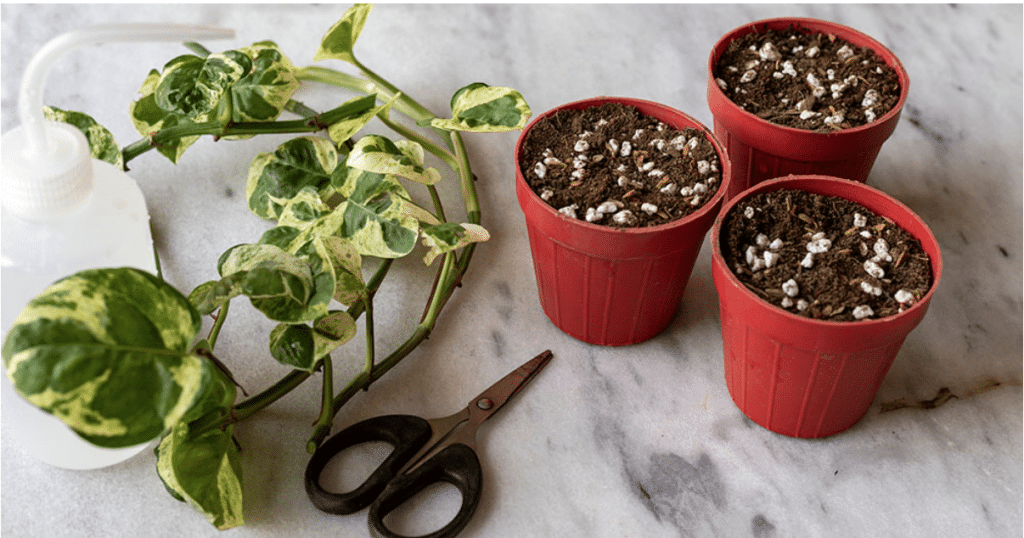
Tools required to propagate trailing indoor plants
- Clean, sharp scissors or pruning shears
- Glass jars or propagation stations for water rooting
- Small pots and potting mix for soil propagation
- Rooting hormone (optional, helpful for some types)
- Labels, clear plastic bags, or humidity domes
- Spray bottle for misting if propagating in soil
Step-by-Step Guide to Propagation Method: Water propagation
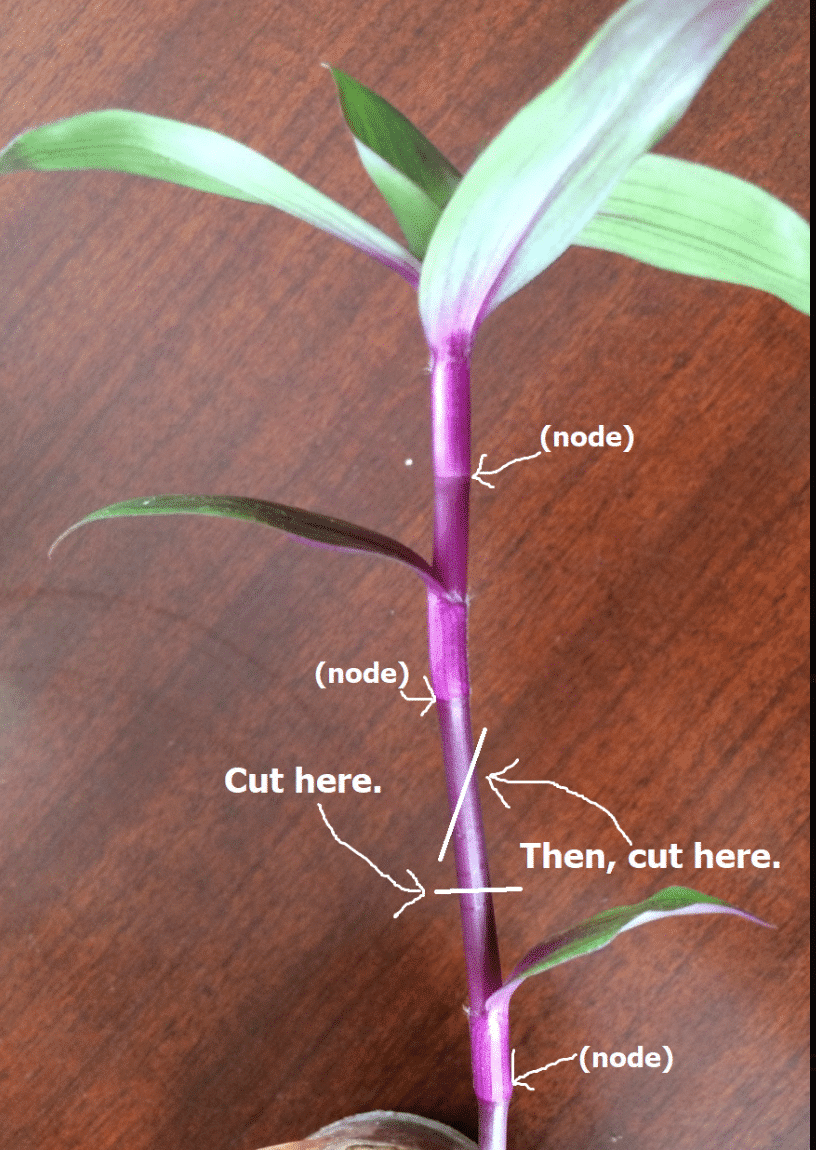
Identify a Healthy Vine with 1–2 Leaf Nodes
We always start by finding a section of vine that looks strong—no yellowing leaves, no mushy spots. You want at least one visible node, but two gives better odds. That node is where the magic happens—it’s where the roots will push out.
Cut Just Below a Node Using Clean Shears
This is where we used to mess up. We’d cut above the node or in between leaves and then wonder why nothing happened. Always cut just below the node with clean, sharp scissors or pruning shears. Dirty blades = higher chance of rot or infection.
Place in Water with Node Submerged
We use a clear glass jar or bottle so we can keep an eye on root growth. Only the node should be underwater—leaves sitting in water will rot fast. If you’re dealing with a super leafy vine, remove the lower leaves so only stem and node go in.
Change Water Every 3–5 Days
This step makes or breaks your success. We forgot to change the water once and ended up with cloudy gunk and a cutting that smelled… funky. Now we set a reminder and swap it out every few days to keep things fresh and oxygenated.
Wait for Visible Root Growth (1–4 Weeks Depending on Plant)
Here’s where patience comes in. Pothos might root in a week, but string of hearts or hoya can take longer. We try not to poke or move the cuttings too much while they’re rooting—just keep them warm, bright (indirect light!), and wait. Once the roots are a couple of inches long, it’s usually safe to pot them up.
Step-by-Step Guide to Propagation Method: soil propagation
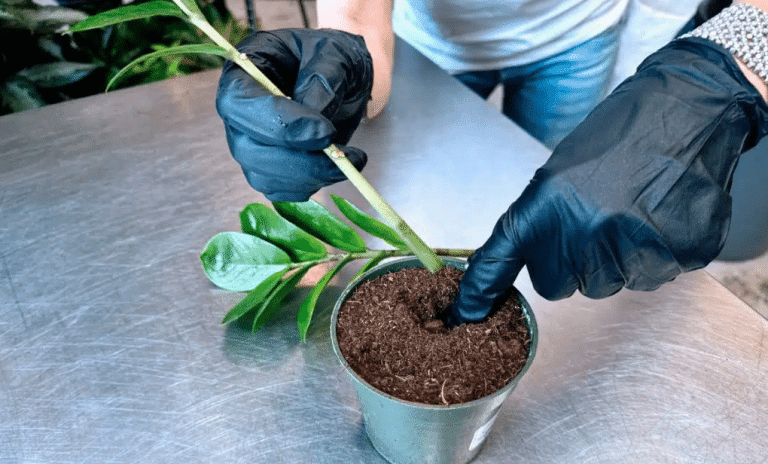
Cut Below a Node and Dip in Rooting Hormone (Optional)
We usually start by snipping just below a healthy node using clean shears—same as water propagation. That node is where roots will grow, so don’t skip it. Some plants root easily on their own, but when we’re dealing with fussier types (like hoya or string of hearts), we’ll dip the end in a bit of rooting hormone powder. It’s not essential, but we’ve seen faster root development when we use it.
Plant Directly Into Moist Potting Mix
Don’t wait too long after cutting—get that vine into the soil while it’s still fresh. We use a light, well-draining potting mix (usually coir, bark, and perlite) and pre-moisten it so it’s damp but not soggy. Then we tuck the cutting in just deep enough to bury the node and gently press the soil around it.
Cover with Humidity Dome or Bag If Possible
This step changed everything for us. When we started covering our soil-propagated cuttings with a plastic bag or using a takeout container as a dome, our success rate shot up. That extra humidity helps reduce transplant shock and keeps the leaves from drying out while roots form. Just make sure there’s a little airflow—poke a few holes or lift the bag once a day.
Keep Soil Lightly Moist, Not Soggy
This part’s tricky. Too much water and your cutting will rot. Too little and it’ll crisp up before it even roots. We check the soil daily and mist it lightly if the surface starts to dry. A spray bottle is perfect for this—gentle and precise.
Place in Bright, Indirect Light
Don’t stick your cuttings in a dark corner, but don’t bake them in sun either. We’ve had the best luck placing them near an east or north-facing window. Bright, indirect light keeps them warm and encourages growth without scorching tender new roots or leaves. If it’s winter or your light is low, a small grow light can really help speed things up.
Step-by-Step Guide to Propagation Method: Leaf Propagation (for specific plants)
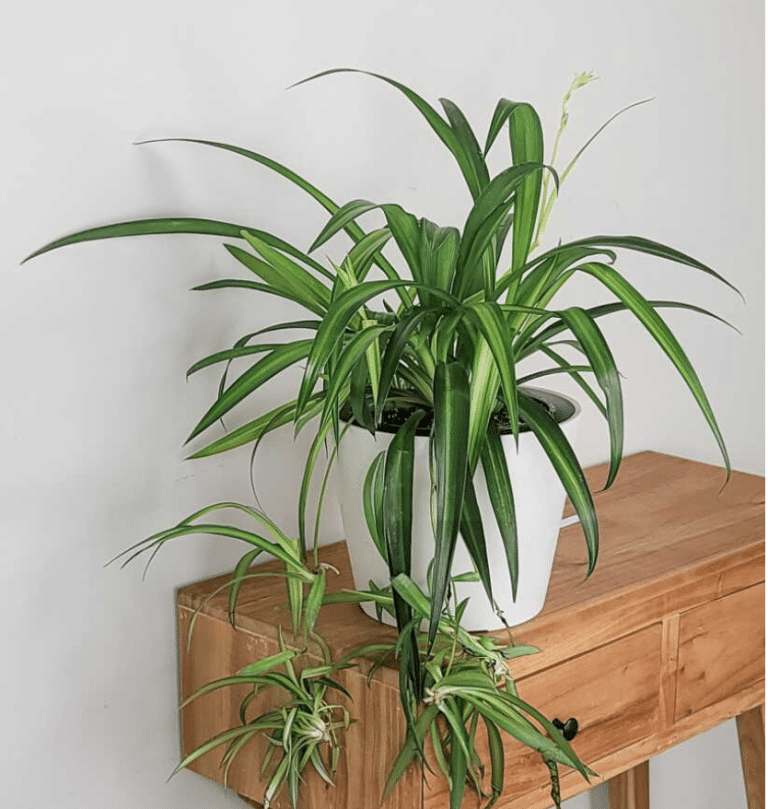
Gently Untangle or Separate Trailing Offsets (e.g., Spider Plant Pups)
Some plants make propagation super easy by doing half the work for you—looking at you, spider plants. Those little pups that dangle off the mother plant? They’re basically begging to be potted up. We always wait until they have visible roots, then gently untangle them from the mother plant without yanking or twisting. A little patience here goes a long way—if you rush it, you might snap off healthy roots before they’re ready.
Use Sterilized Scissors to Divide Vines at Rooted Nodes
For trailing plants like pothos or tradescantia that send out roots along the vine, we find the spots where roots are already forming in the soil or air. Then we snip right between nodes using clean, sterilized scissors. If you skip cleaning your tools, you risk spreading disease—and yes, we learned that one the hard way. We wipe our blades with rubbing alcohol between each cut, especially when dividing different plants.
Replant with Fresh Soil and Water Gently
Once we’ve divided, we set each new section into its own small pot with fresh, well-draining soil. We never reuse old soil for new cuttings—it can hold onto pathogens or lack nutrients. After planting, we water gently until the soil is evenly moist but not soaked. Then we leave the plant alone in bright, indirect light to settle in. No fertilizer, no fuss, just some TLC and consistent moisture until we see new growth.
Read also: Our guide to best hanging baskets for trailing indoor plants
Aftercare for New Cuttings
Transition Rooted Water Cuttings to Soil Slowly
We’ve learned not to rush this part. Moving a cutting from water to soil too abruptly can shock the roots—they’re used to constant moisture and zero resistance. When we transplant, we always pre-moisten the soil so it’s damp (not soggy), then nestle the roots in gently. And for the first few days, we keep the soil lightly moist to ease them into their new environment.
Keep Humidity High for the First Week After Transplanting
Humidity is your best friend right after transplanting. Those new roots aren’t efficient yet, and the leaves can dry out fast. We cover our freshly potted cuttings with a plastic bag or humidity dome for the first week, just like we would for soil propagation. If the space is already humid—like a bathroom with bright light—you might not need it, but a little extra moisture goes a long way.
Avoid Direct Sun—Stick to Bright, Indirect Light
We made the mistake once of putting a newly potted cutting in a sunny window, thinking more light = faster growth. Bad idea. The leaves scorched before the roots could anchor. Now we stick to a spot with bright, indirect light—like an east-facing window or a few feet back from a south window. It gives the plant energy without overwhelming it.
Don’t Fertilize for at Least 4–6 Weeks
As tempting as it is to give them a “boost,” new cuttings don’t need fertilizer right away. In fact, it can burn those tender roots. We wait at least a month, sometimes longer, before even thinking about feeding. Once we see new growth, that’s usually our sign it’s time to start with a diluted liquid fertilizer.
Watch for Signs of Transplant Shock: Drooping, Yellowing, or Leaf Drop
A little stress is normal, but it helps to know what to look for. We’ve seen cuttings droop for a day or two after transplanting—totally fine. But if they stay limp, start yellowing, or drop multiple leaves, it usually means the roots are struggling. Our fix? Back off on watering, raise humidity, and give them a few days undisturbed. Most bounce back once they’ve adjusted.e a clear window. Not to mention its just healthy all around 🙂
Common Mistakes to Avoid When Propagating
Cutting Without a Node (No Roots Will Grow)
This one’s the classic rookie mistake—we’ve made it more times than we’d like to admit. You can’t just snip a pretty section of vine and expect roots to appear like magic. If there’s no node, there’s no place for roots to grow. We now double-check every cutting for at least one visible node (those little bumps along the stem), and ideally cut just below it for the best rooting success.
Leaving Leaves Submerged in Water (They’ll Rot)
When leaves sit below the waterline, they break down fast, which not only rots the leaf but ruins the water for rooting. We always remove any leaves that would sit underwater before placing the cutting in the jar. Clean water = healthy roots.
Using Dirty Tools = High Risk of Infection
We didn’t sterilize our scissors early on, thinking it was overkill. Then we started noticing that some cuttings would blacken or get soft at the cut end. A quick wipe with rubbing alcohol or a bleach solution makes a big difference. Clean tools mean cleaner cuts—and healthier starts.
Overwatering in Soil = Root Rot
Use a spray bottle to lightly mist the soil when the top feels dry, and we always plant in a well-draining mix (coir + perlite is our go-to). Damp, not wet, is the sweet spot. This prevents root rot!
Giving Up Too Soon—Some Plants Take Weeks to Root
This one’s more emotional than technical. Sometimes we’d check after 5 days, see no change, and toss the cutting thinking it failed. But some plants—especially hoya or string of hearts—can take weeks to root. These days, we wait at least 3–4 weeks before making any decisions. And we celebrate the tiniest white root nub like it’s a miracle. Because honestly? It kind of is.
Conclusion:
Propagating trailing houseplants isn’t just easy—it’s deeply rewarding. With just a pair of scissors, a glass of water, and a little patience, you can turn one leggy vine into a whole collection of thriving plants. Whether you’re sharing cuttings with a friend or filling every windowsill in your home, following the right steps makes success almost inevitable.
So go ahead—snip that vine. Your plant parenting skills are about to level up.

