Curly Spider Plant Care: Keep Your Twisted Leaves Thriving
Learn the secrets to caring for curly spider plants, from ideal humidity and watering to leaf curl solutions, grown in our Brooklyn community home.
When you purchase through links on our site, we may earn an affiliate commission, which helps sustain our blog!
curly spider plant care guide
Summary
How to care for curly spider plant?
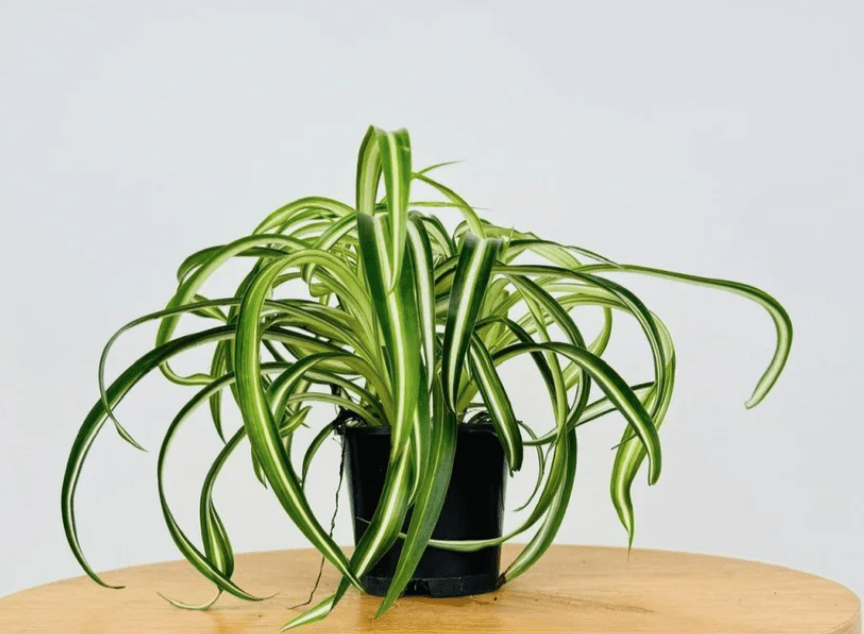
Curly Spider Plant, a playful twist on the classic variety, features arching, spiral leaves and is one of the easiest, pet-safe houseplants to grow.
- Water when the top inch of soil dries out, and allow excess to drain fully.
- Grows best in bright, indirect light but tolerates low light; ideal range is 60–80°F.
- Non-toxic to pets (ASPCA), making it a safe choice for homes with cats and dogs.
- Plant in well-draining soil with perlite; fertilize monthly in spring and summer with a balanced liquid fertilizer.
- Common issue: brown tips from low humidity or fluoride—trim edges, increase humidity, and use filtered water.
- Propagate by detaching plantlets and rooting them in water or moist soil.
lineage and Symbolism
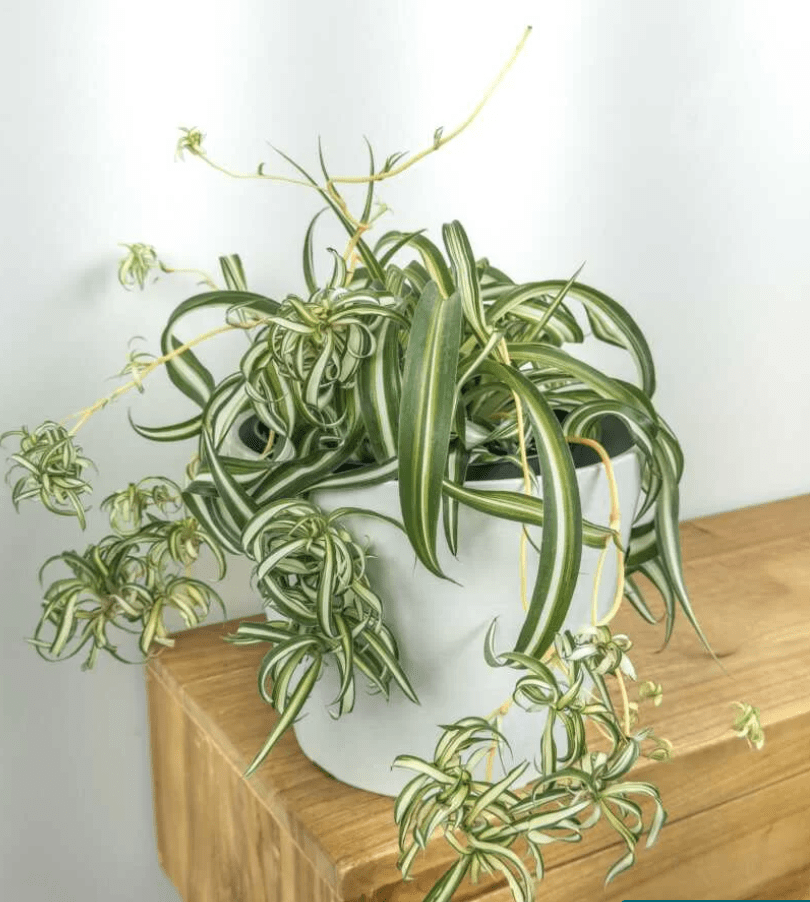
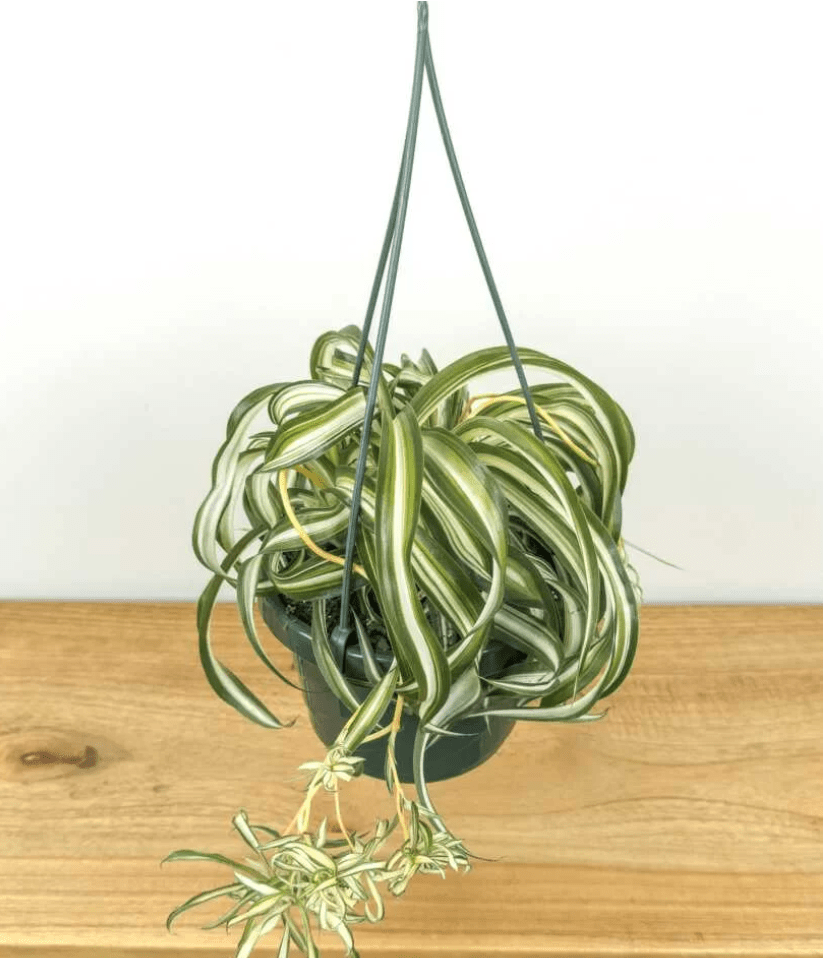
The Curly Spider Plant (aka Chlorophytum comosum ‘Bonnie’), part of the Asparagaceae family, has curly leaves in soft green and cream stripes. We love placing it on a shelf or but also makes a great trailing plant near a bright window where its cascading leaves can really shine – but without direct sun exposure.
It’s compact enough for a desk or countertop, and grows up to 12-15 inches high! A fun fact: These plants produce little spiderettes that look like mini plants on the ends of long stems—perfect for sharing with friends or filling out your green space!
The Curly Spider Plant symbolizes resilience and renewal, which makes a perfect match for nurturing and adaptable Cancers who thrive in fostering growth and harmony. Read Also: Hawaiian spider plant, and Hanging spider plant

($34)

($16)
“This spider plant is lovely especially the way it curls, and seems to require little to no care! “
Light and placement
What is the light requirement for curly spider plant?
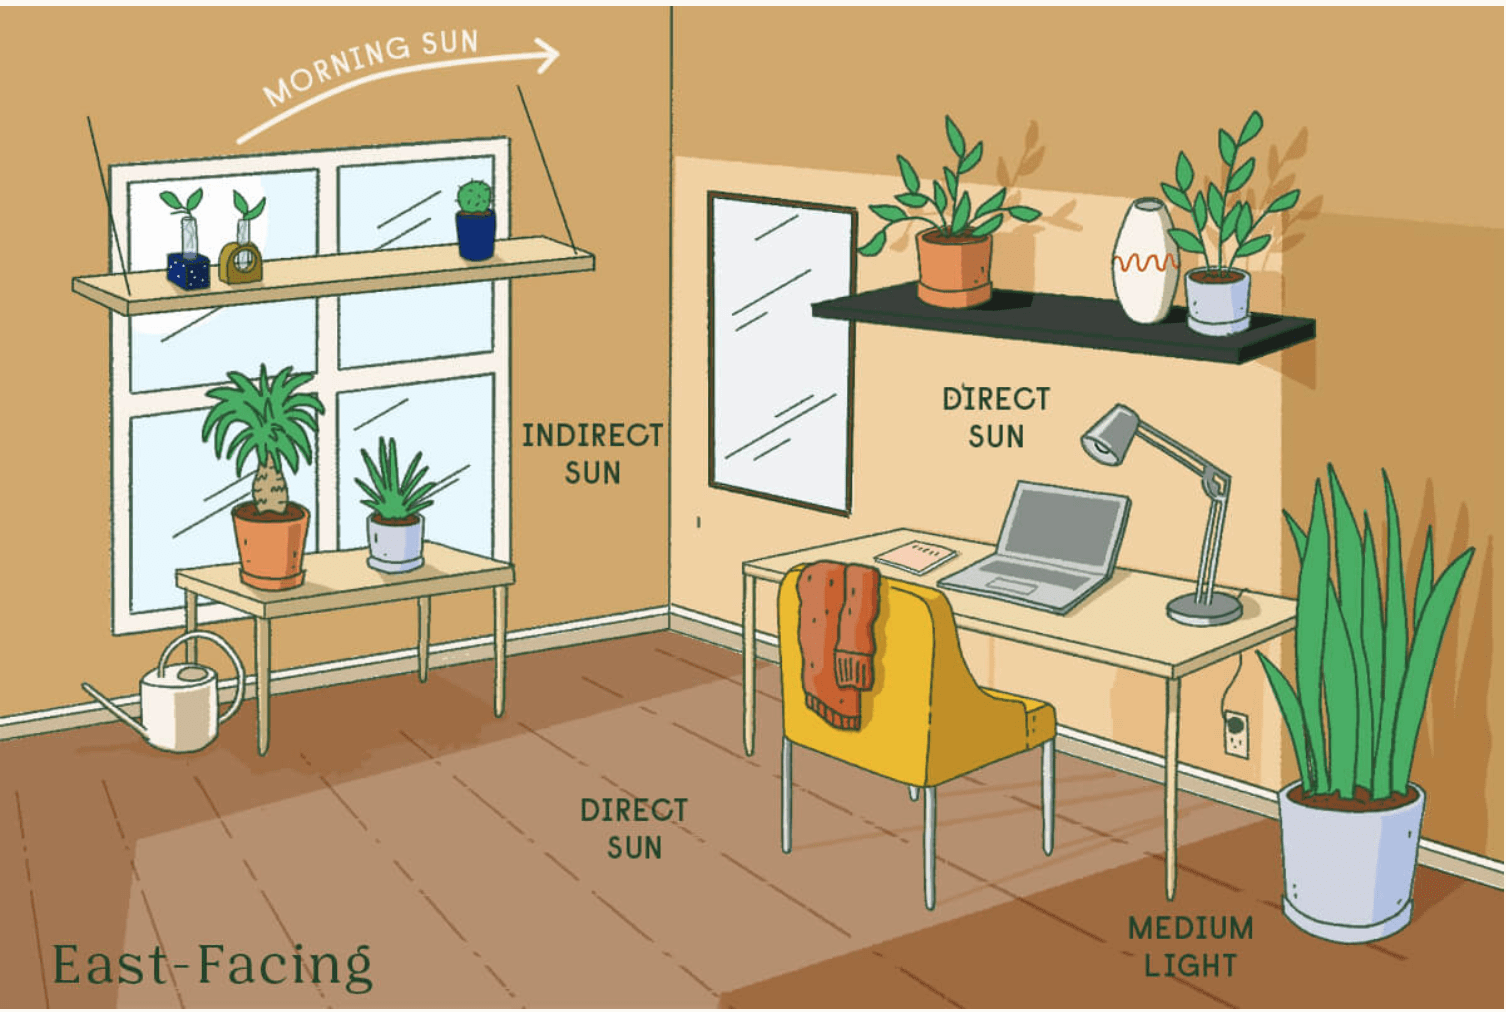
The Curly Spider Plant does best in bright, indirect light, though it can adapt to medium light conditions. We suggest placing it near an east or north-facing window where it gets gentle morning light. Too much direct sun might scorch its leaves. Aim for about 6-8 hours of indirect light to keep it vibrant. If kept in lower light, the plant may grow more slowly, with leaves losing some of their bright variegation, and they may also droop and stretch toward the sun.
How to know if curly spider plant is not getting right amount of light?
When the Curly Spider Plant gets too much light, we often see its leaves turning pale or scorched, with crispy brown tips—especially if it’s exposed to harsh afternoon sun. If the plant isn’t getting enough light, its leaves may start to lose their vibrant variegation, becoming more solid green and the growth may slow down noticeably.
Where to place curly spider plant and where to avoid?
For the Curly Spider Plant, we recommend placing it near an east or north-facing window where it gets gentle morning or indirect light. Ideal spots include a well-lit shelf, a windowsill, or a hanging planter a few feet from these windows. Avoid south and west-facing windows, especially in summer, as the intense afternoon sun can be too strong and may damage the leaves. If you’re set on a sunnier spot, try placing the plant a bit further back or using sheer curtains to diffuse the light.
During winter, when daylight hours are shorter, you might want to bring it closer to an east-facing window to capture any available sunlight.
Soil
What soil composition to use for curly spider plant?
For the Curly Spider Plant, we recommend a well-draining potting mix with a balanced composition of loam and added perlite or coarse sand for aeration. A good mix is 2 parts loam, 1 part perlite, and 1 part sand. This setup helps prevent waterlogging. Aim for a slightly acidic to neutral pH, around 6.0-7.0. Avoid topsoil, as it’s too dense for container plants, and we always recommend to steer clear of peat for an eco-friendly choice!
Best soil to use for curly spider plant?

This is a great popular soil mix for your Curly Spider plant, and suitable for most other indoor plants as well! If you’re using other potting mixes, just make sure to add more perlite!
Temperature and Humidity
What is the best temperature condition for curly spider plant?
The Curly Spider Plant thrives best in temperatures between 65-75°F. In colder months, keep it away from drafty windows or doors to avoid chills. Temperatures below 50°F can lead to leaf browning and sluggish growth. If you’re in a warmer region, ensure it’s not in direct sun – overheating may cause wilting or leaf tip burn.
What is the best humidity condition for curly spider plant?
The Curly Spider Plant prefers moderate humidity, around 40-60%. In drier climates or during winter, we recommend placing it near a humidity tray or misting lightly (perhaps once every week) to prevent leaf tips from browning. If you’re in a very humid region, ensure good air circulation, as too much humidity can lead to fungal issues which show up as spots or mold on the leaves.
Watch for crispy, browning tips as a sign of low humidity, and wilting or yellowing leaves if humidity is too high.
Our favorite humidifiers

($34)

($67)
fertilizer
What is the best fertilizer composition to use for curly spider plant?
For the Curly Spider Plant, which naturally thrives in slightly moist soils, we recommend a balanced fertilizer with a 10-10-10 NPK ratio. This provides the essential nitrogen, phosphorus, and potassium needed to support its leafy growth and strong root development. Apply monthly during spring and summer, but stop in fall and winter.
For a simple DIY recipe: Mix 1 tablespoon of Epsom salts (for magnesium) and a small amount of diluted fish emulsion in a gallon of water for a small nutrient boost!
How and when to fertilize curly spider plant?
Fertilize the Curly Spider Plant once a month during the growing season (spring and summer) with a balanced liquid fertilizer, diluted to half strength. We recommend pouring it directly into the soil around the base of the plant. Avoid the leaves to prevent burn.
What are the signs curly spider plant needs food?
Signs that the Curly Spider Plant needs fertilizing include pale or yellowing leaves, slower growth, and a general lack of vibrancy. If the plant’s leaves look faded or growth seems stunted despite proper light and water: it may be time to feed it
Best fertilizer to use for curly spider plant?

Pots and planters
What are the best pots to use for curly spider plant?
For a hanging Curly Spider Plant, we recommend a lightweight, breathable terracotta pot with drainage holes to prevent root rot, or a plastic hanging planter. A pot around 6-8 inches wide works well, providing enough space for its root growth while keeping the plant compact for hanging displays. Choose a shallow but sturdy pot with a wider mouth which is great to allow its cascading spiderettes to drape beautifully.
Our favorite pots for curly spider plant


Watering
How and When to water curly spider plant?
Water them once the top inch of soil feels dry, typically every 1-2 weeks in spring and summer, and reduce to once a month in winter. We recommend watering in the morning to let any excess moisture evaporate during the day. Avoid overhead watering, which can damage leaves—pour directly onto the soil around the base of the plant for best results!
what are the Signs of over or under watering curly spider plant?
For the Curly Spider Plant, overwatering often shows up as yellowing leaves with soft, mushy roots—clear signs that the roots are sitting in too much moisture. You might also notice browning tips. Underwatering causes the leaves to turn crispy brown at the tips and edges, with a slight curling and general limpness while the plant struggles to retain moisture.
Our favorite watering cans

($14)

($25)
pruning
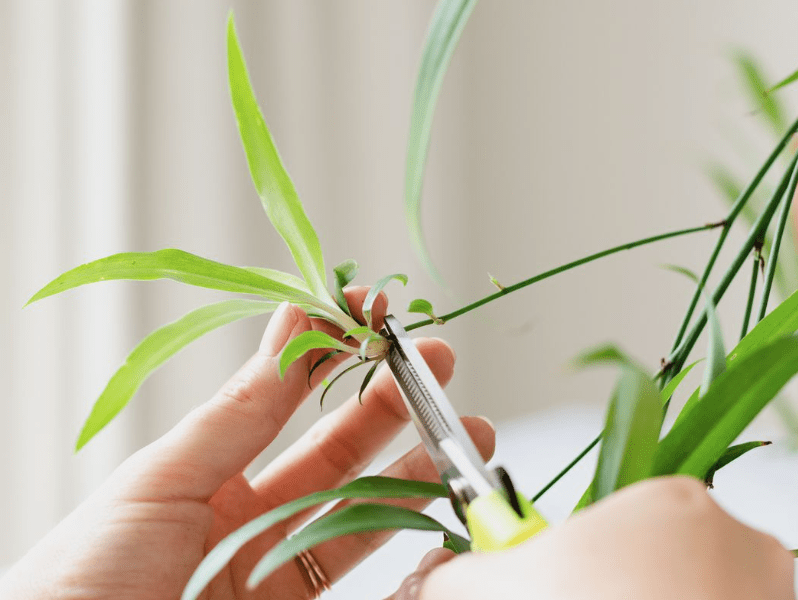
When to prune curly spider plant and why?
Pruning the Curly Spider Plant encourages fuller growth and removes damaged or discolored leaves, which helps with its foliage. Signs it’s time to prune include yellowed leaves, leggy stems, or an overcrowded look. Best to prune in spring or summer when the plant is actively growing!
how to prune curly spider plant (step by step)?
Prepare Tools
Use sharp scissors or pruning shears to prevent infection. Sterilize with rubbing alcohol before starting.
Remove Damaged Leaves
Locate any yellow or brown leaves near the base, and cut them close to the soil line without tugging, which could harm the roots.
Trim Leggy Stems
For any overly long stems or spiderettes (baby plants) that look sparse, trim them back by half to promote bushier growth. Cut just above a node (the small bump where leaves attach).
Shape the Plant
If the plant looks unbalanced, trim select leaves and stems around the plant to create a uniform, rounded shape.
how to care after pruning curly spider plant?
After pruning, water lightly and place the plant in bright, indirect light. Resume fertilizing only after a couple of months once the plant has already developed some leaves.
propagating
When to Propagate curly spider plant?
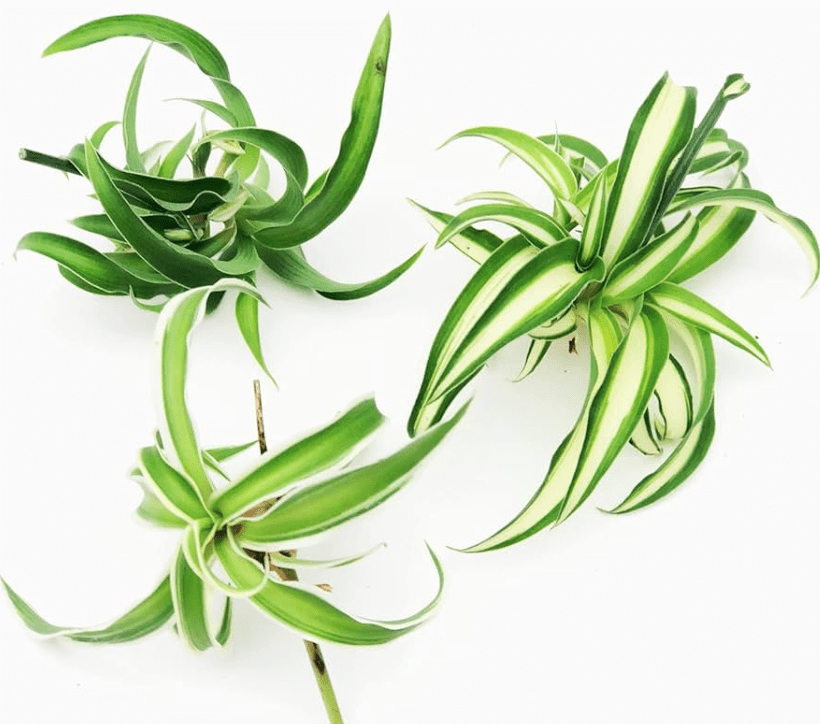
The Curly Spider Plant is easiest to propagate by using its spiderettes (baby plants) that form on long stems. The best time to propagate is in spring or early summer, when the plant is actively growing and the temperature is warm.
how to Propagate curly spider plant (step by step)?
Select Healthy Spiderettes
Look for spiderettes that have small roots already forming. It should look like th eimage on the top left above. These babies are ready for propagation and will establish faster than those without visible roots.
Prepare the Container
Fill a small pot with a well-draining potting mix, or prepare a shallow dish of water if you prefer water propagation. For soil, lightly moisten it without making it soggy.
Cut or Separate the Spiderette
Using clean, sharp scissors, snip the spiderette close to where it connects to the main plant. If the baby has roots, you can plant it directly in soil; otherwise, start it in water.
Place in Water or Soil
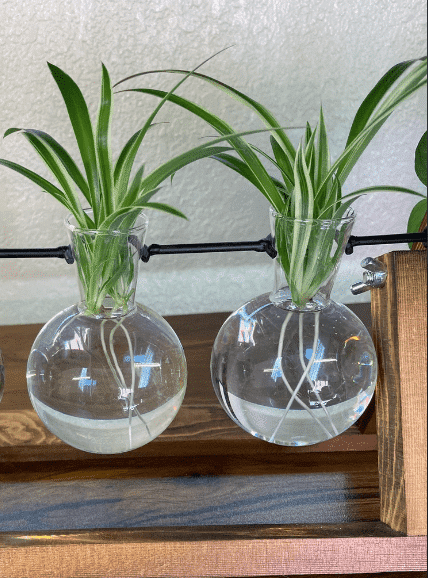
In Water: Submerge the baby plant’s root section in water, keeping leaves above the surface. Place it in bright, indirect light, refreshing the water every few days. When planted it should look like the image to the right above.
In Soil: Insert the root base gently into the soil, pressing lightly to secure it. Water lightly to settle the soil around the roots.
how to care after propagating curly spider plant?
Avoid overwatering newly potted spiderettes – excess moisture can lead to root rot. Ensure pots have drainage holes if using soil. Keep in bright, indirect light, and once roots develop fully (usually in 2-3 weeks in our experience), treat them as mature plants, and follow with regular watering and feeding routines.
Troubleshooting common issues
1. Why is my curly Spider Plant not flowering?
Cause: Lack of light or nutrients can inhibit flowering in Spider Plants.
Solution: Provide consistent bright, indirect light and fertilize monthly during growing seasons to encourage blooms. Stop fertilizing during winter as it will discourage blooms and encourage leafy foliage.
2. Why are the leaves of my curly spider plant yellowing?
Cause: Yellow leaves commonly indicate overwatering.
Solution: Check the soil moisture and adjust watering, ensuring good drainage to prevent soggy roots. Stop watering for a 2-3 weeks and then resume watering once in every two weeks.
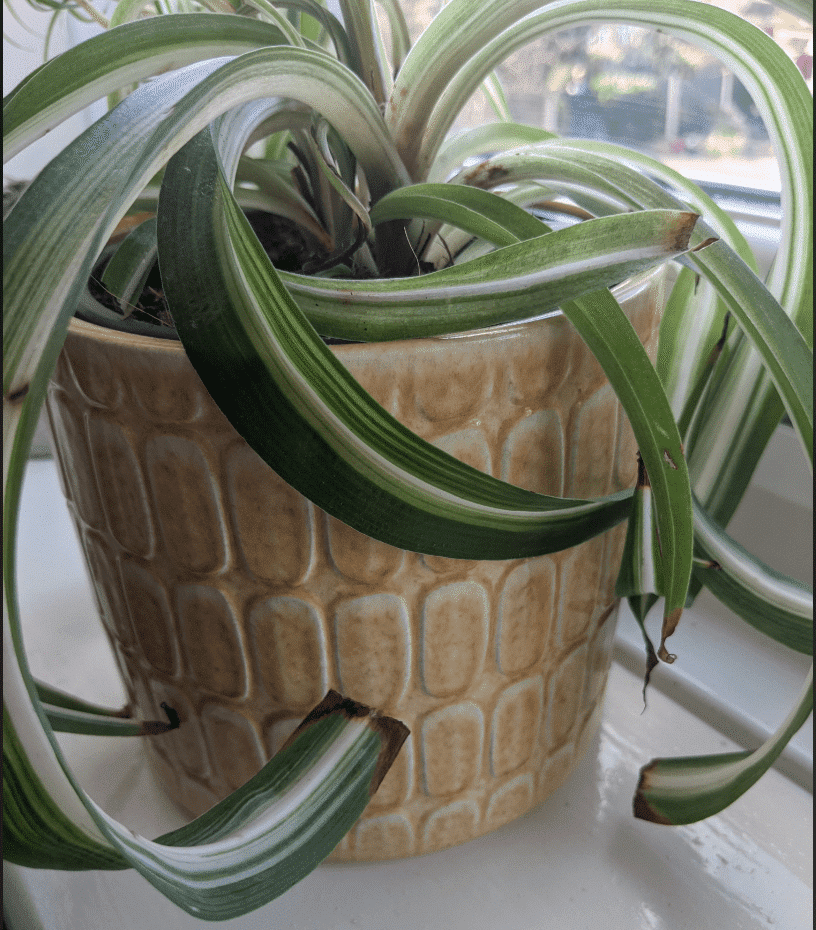
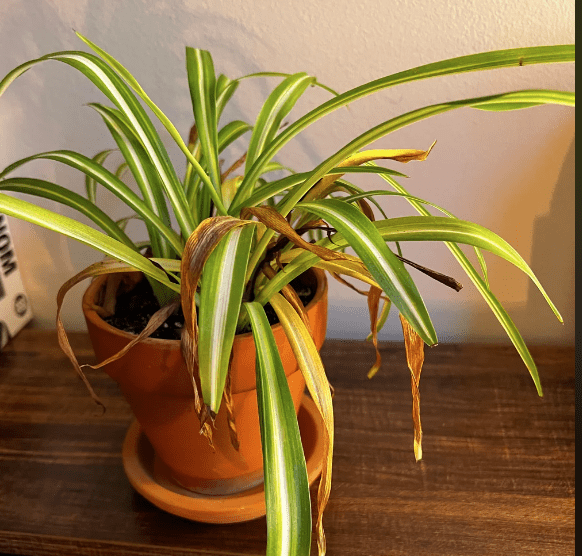
3. Why are there Brown tips to the leaves of my curly spider plant?
Cause: Low humidity or salt buildup from fertilizer often leads to brown tips.
Solution: Increase humidity around the plant and flush the soil monthly with water to wash out any excess salts. You could either use a humidifier, or place the plant in a well lit bathroom!
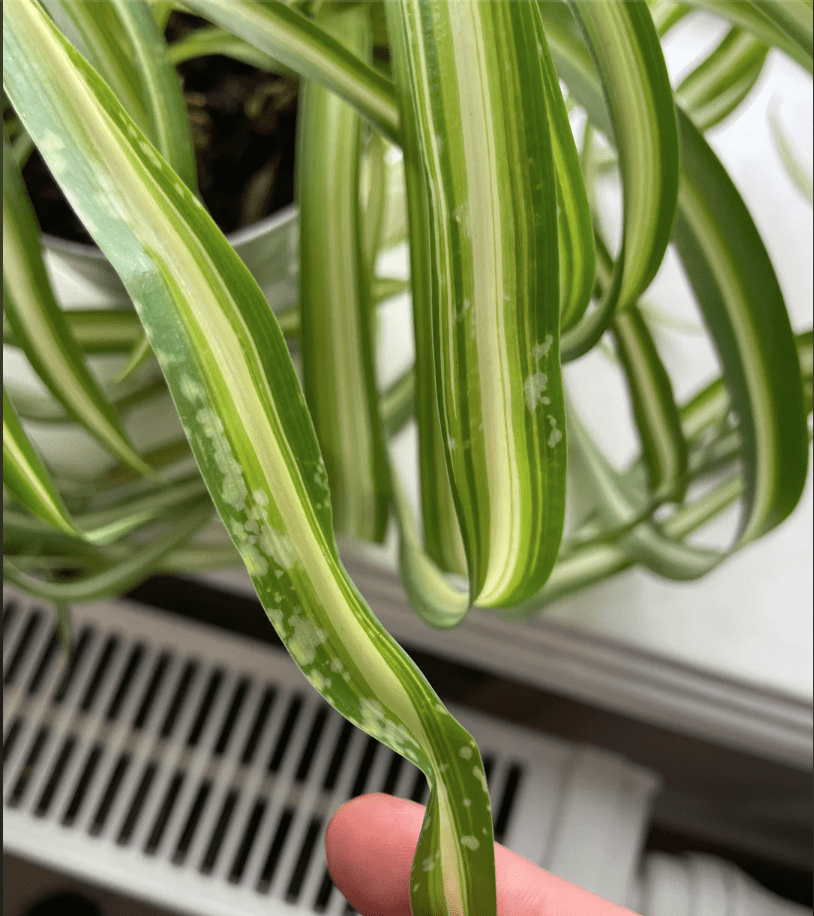
4. Why are there spots on my curly Spider Plant’s leaves?
Cause: Spots may appear due to fungal infections in high humidity.
Solution: Increase airflow around the plant, avoid overhead watering, and trim affected leaves. A gentle fungicide can also help. Use neem oil and wash the leaves a few times until the problem persists.
5. Why is my curly Spider Plant wilting despite proper watering?
Cause: Root rot from overwatering can cause wilting even when the soil feels moist.
Solution: Check for mushy, blackened roots: if found, trim away damaged roots and repot in fresh, well-draining soil. Use the mixture recommended above, ideally in a terracotta pot whose base is wider than the roots by 2-3 inches!
6. Why is my curly Spider Plant producing fewer plantlets?
Cause: Low light or insufficient nutrients may limit the production of baby plants.
Solution: Increase light exposure to bright, indirect light, and fertilize during the growing season to encourage more plantlets.
8. Why does my curly Spider Plant have small leaves?
Cause: Small leaves can indicate nutrient deficiencies or inadequate light.
Solution: Fertilize monthly with a balanced fertilizer and place the plant in bright, indirect light to promote larger, healthier leaves.
curated styling tips for curly spider plant
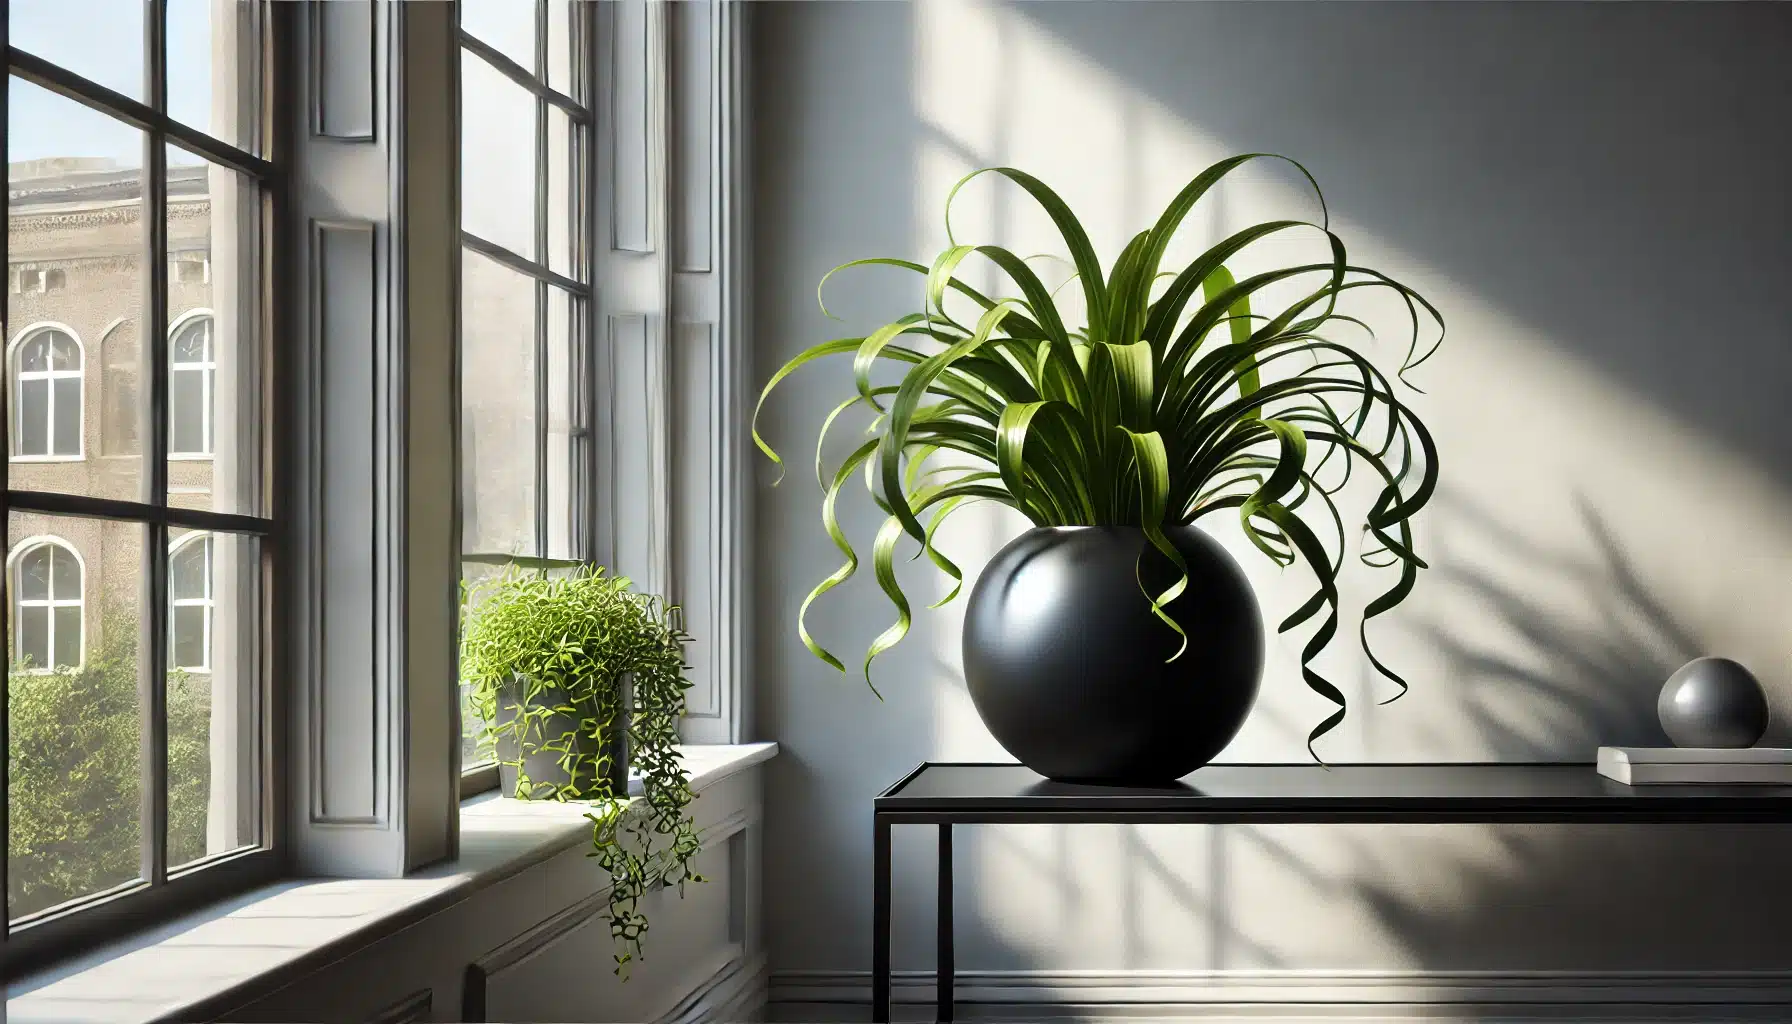
1.Sleek Black Ceramic Pot on a Minimalist Console Table: Use a glossy black ceramic pot to hold the curly Spider Plant on a minimalist console table. The black pot contrasts strikingly with the plant’s green trailing foliage. Place it in a well-lit area with bright, indirect light!
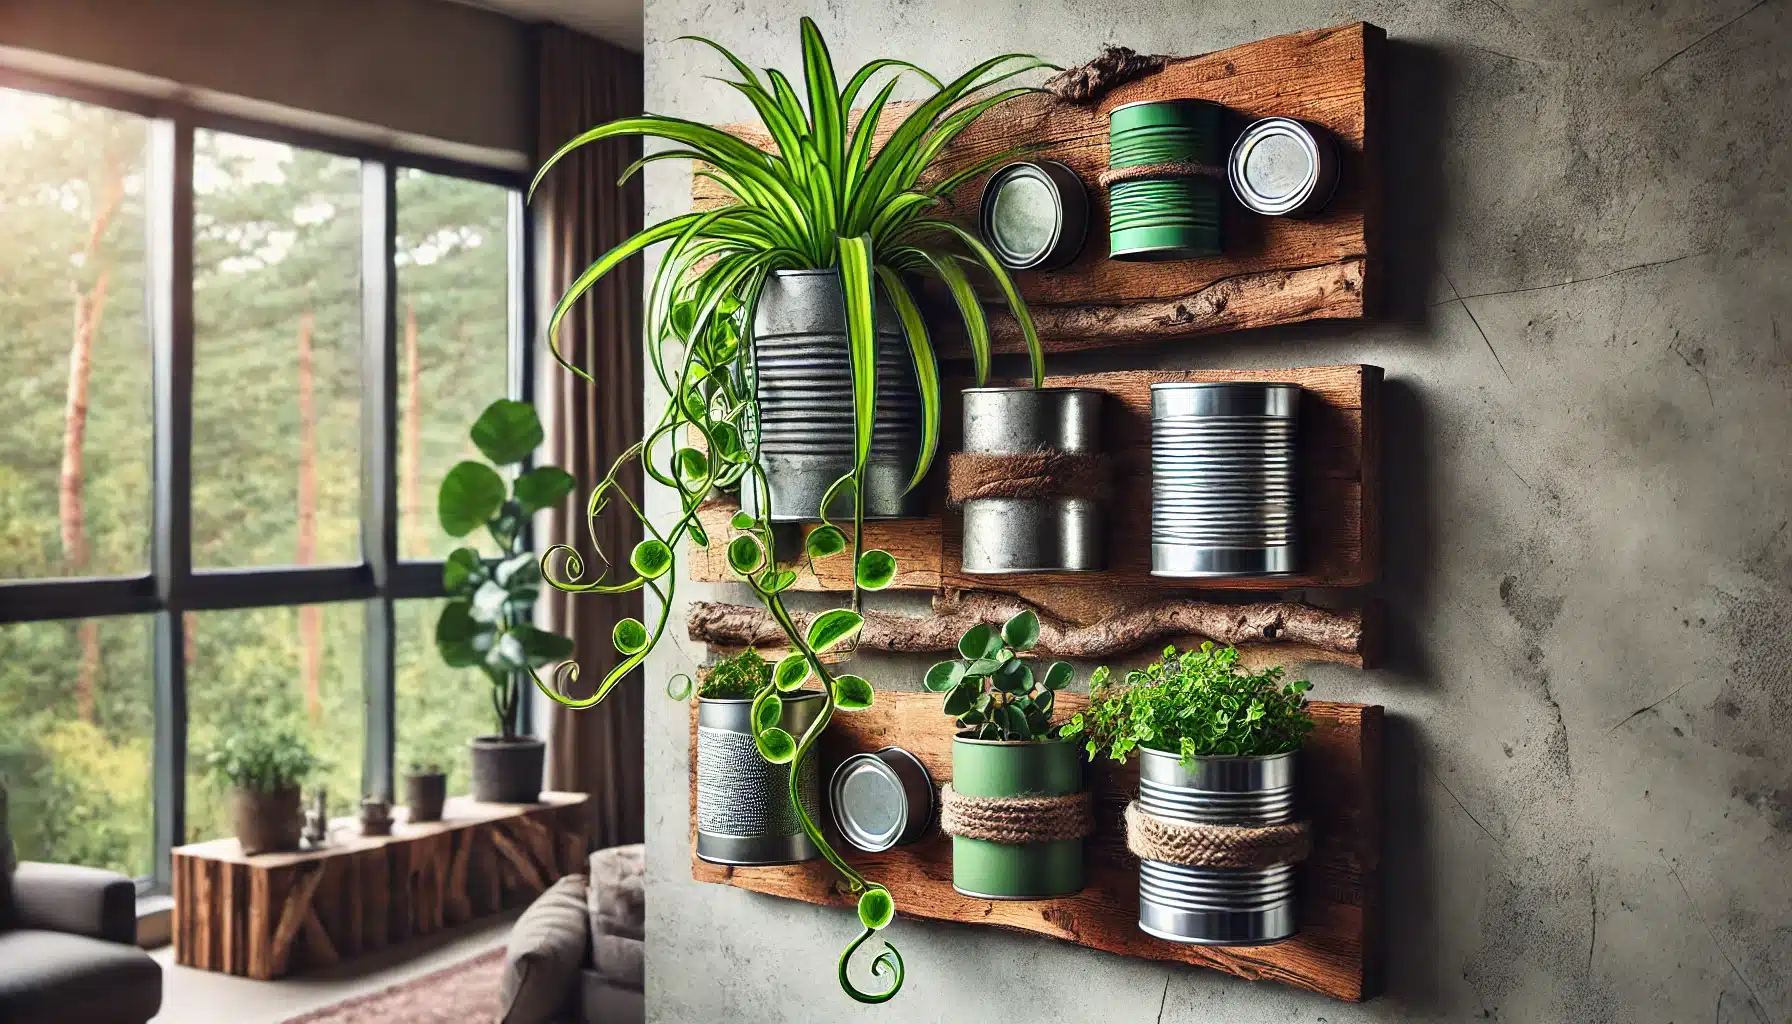
2.Upcycled Tin and Wood Wall Planter: For a unique vertical look, mount a piece of reclaimed wood to the wall with small upcycled tins as planters for a DIY wall garden. Use a tin with drainage holes for the curly Spider Plant. The contrast between the metal and the plant’s vibrant curls gives a playful twist to your wall décor. Make sure to check the moisture regularly because tins dry faster!
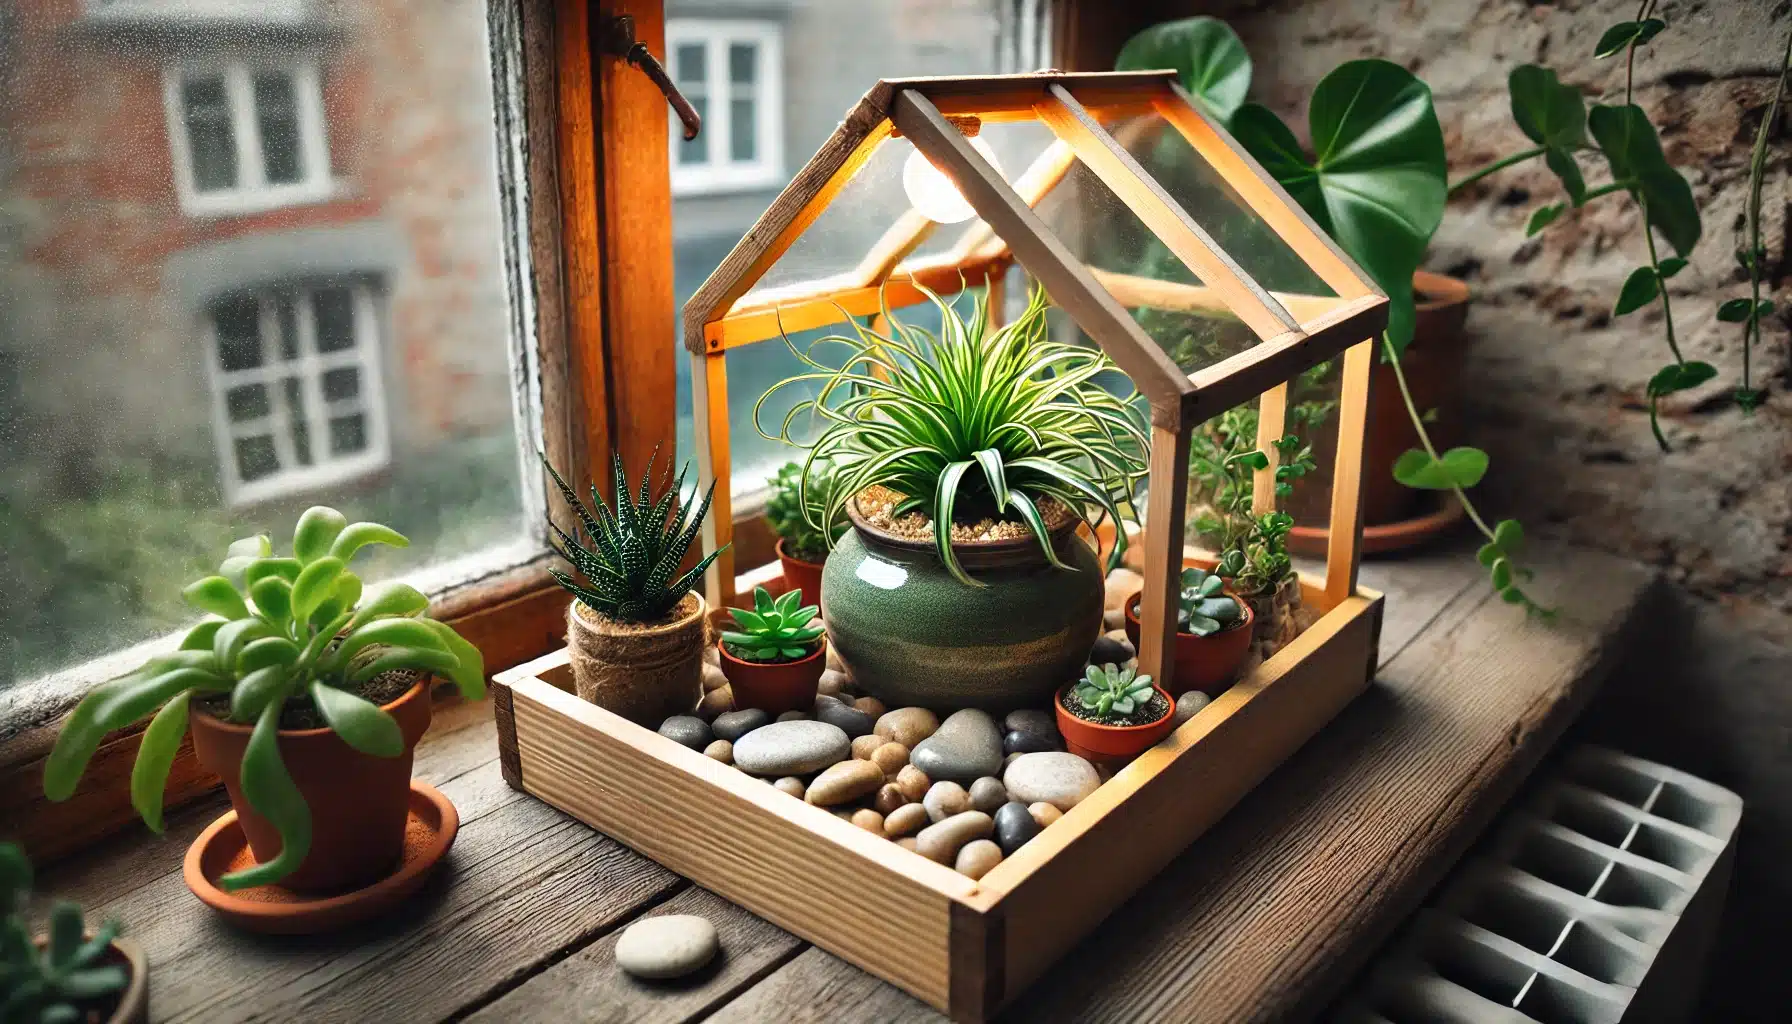
3.Window-Sill Greenhouse Display : Arrange the curly Spider Plant in a medium-sized upcycled ceramic pot with a water tray filled with smooth pebbles. This not only provides extra humidity but also gives a natural look to your indoor greenhouse setup. Position it on a bright windowsill (but out of direct sunlight: north facing window!) alongside other small plants (succulents!) in a DIY mini greenhouse frame made from reclaimed wood.
FAQ
Is curly spider plant toxic to pets?
Yes, Cylindrical Snake Plants are mildly toxic to pets if ingested, causing symptoms like nausea, vomiting, and diarrhea
Does curly spider plant like to be placed outside in summer?
Yes, we can place it outside during summer, but only in shaded areas. Direct sunlight will scorch the leaves- so partial shade places only please.
What are advantages and disadvantages of curly spider plant?
Advantages: Easy care, drought-tolerant, and air-purifying.
Disadvantages: Can be toxic to pets and grows slowly
How big does the curly spider plant grow?
It can reach up to 2-3 feet tall indoors, but growth is quite slow. Outdoors, in partial shade, it might grow even taller.
Does the curly spider plant need a lot of maintenance?
Not at all! We love that this plant requires minimal care—it thrives on neglect, in fact, only needing occasional watering and indirect light.
What are the common pests and bugs for the curly spider plant?
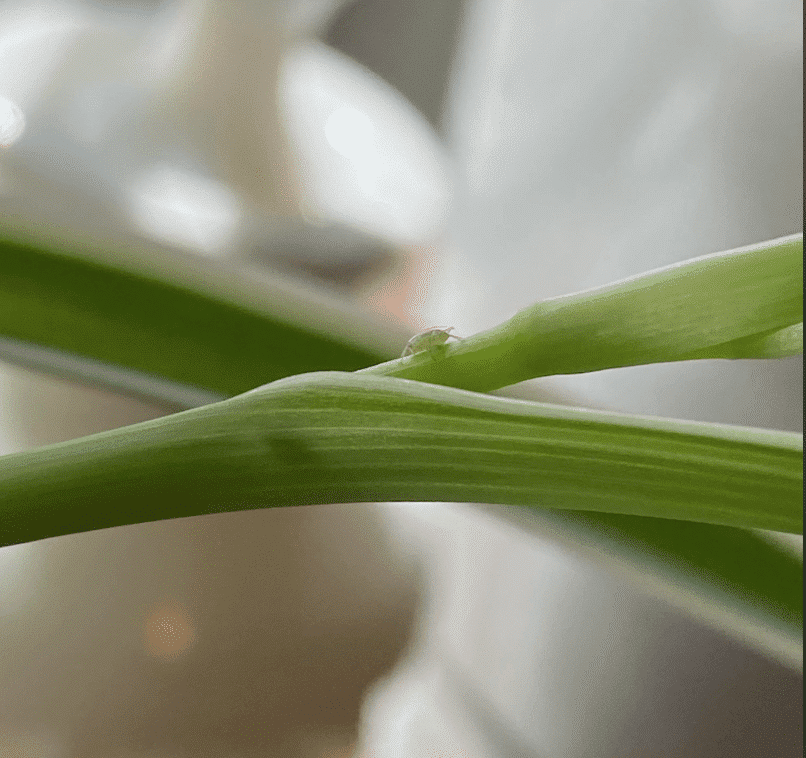
While it’s generally pest-resistant – another reason why it is low maintenance – we may occasionally find spider mites or mealybugs. Regularly wiping the leaves and using neem oil can help prevent infestations!


