The Best Soil and Fertilizer for Boston Fern (What Actually Works)
We grow Boston Ferns in our Brooklyn brownstone — here’s what actually keeps them full and green, the soil mistakes we made before figuring it out, and honest reviews of every product worth buying.

We are an Ad-free community driven site. When you purchase through links here, we may earn an affiliate commission, which helps sustain our blog!
Boston ferns are one of the few houseplants where the wrong soil shows up immediately. Not gradually, not subtly — within a few weeks you’ll see fronds yellowing, tips browning, and a plant that looked lush at the nursery slowly collapsing despite correct watering. Boston ferns are one of the few houseplants where soil choice is well-documented at the research level — the University of Florida IFAS Extension recommends a pH of exactly 5.0–5.5 and a peat-heavy mix for good reason. In practice, getting there in a Brooklyn apartment takes a bit more thought than the research paper suggests! We have been through it!
This page is the buying guide we wish had existed when we started:
- What the plant actually needs, which products we’d buy again,
- Three context-specific DIY formula.
- A fertilizer section that covers everything from NPK to flushing salt buildup.
Read also: best soil and fertilizer for trailing houseplants, best soil and fertilizers for pink princess philodendron
Try our Best Indoor Plants tool for a personalized plant recommendation.
Best Soils for Boston Fern — Our Top 3 Picks

Espoma Organic Potting Mix — Best Overall
This is our first-choice recommendation for indoor boston ferns in pots. Espoma’s organic mix is peat-based, which means it starts naturally acidic — closer to the pH range boston ferns actually want than most bagged mixes. The organic content is genuinely high, it holds moisture well without becoming waterlogged, and it doesn’t compact as aggressively as cheaper mixes. We amend it with perlite for indoor use (more on exact ratios in the DIY section), but as a starting base it’s the best off-the-shelf option we’ve found.
Pros: Naturally acidic pH, high organic content, good moisture retention, widely available at garden centers. Cons: Needs perlite amendment for indoor pot use. Not ideal straight from the bag for hanging baskets without moisture amendment.

FoxFarm Ocean Forest — Best for Nutrient Head Start
Ocean Forest runs slightly acidic out of the bag (around 6.3–6.8 pH — not quite as low as we’d like for boston ferns but better than most), and it’s nutrient-rich from bat guano, worm castings, and sea kelp. The upside is that your fern gets a built-in nutrient head start and you can hold off on fertilizing for the first month or two. The downside for ferns specifically is that it holds less moisture than an Espoma-based mix and the structure is less forest-floor-like. We always amend it with extra peat or coir to bring moisture retention up and pH down slightly.
Pros: Nutrient-rich base, slightly acidic pH, good organic content, widely available.
Cons: notably higher than the 5.0–5.5 boston ferns need, so acidifying amendment is essential, not optional, with this mixNeeds moisture retention amendment for ferns. Pricier than Espoma.
Best for: Indoor ferns where you want built-in nutrition and are comfortable amending. Use 70% Ocean Forest + 20% peat + 10% perlite.

Miracle-Gro Moisture Control Potting Mix — Best for Hanging Baskets and Outdoor Ferns
We’re honest about Miracle-Gro products on this site: for most aroids we’d steer you elsewhere. But for hanging basket boston ferns and outdoor ferns, Moisture Control is actually well-suited. The higher moisture retention — usually a liability for plants that need fast drainage — is an asset for ferns in baskets that dry out twice as fast as pot-grown plants. The pH runs slightly higher than ideal, which we address by watering with slightly acidified water every few weeks. For indoor pot use, we’d choose Espoma instead.
Pros: Strong moisture retention, widely available, affordable, good for hanging baskets and outdoor use.
Cons: pH runs slightly high for boston ferns. Too moisture-retentive for indoor pots without drainage amendment. Not organic.
Best for: Hanging basket ferns and outdoor garden bed ferns.
What We Wish We’d Known Before Buying Soil for Our Boston Fern
- If I run a humidifier near my boston fern, does that change what soil I need?: Yes, and most guides don’t account for this. Humidifiers cause soil to dry unevenly — the surface feels dry while the middle stays wet. If you water based on surface feel (which most people do), you end up chronically overwetting the root zone without realizing it. Indoor boston fern mixes need more perlite than standard recipes call for to compensate. Our indoor formula runs 35% perlite for exactly this reason.
- Does soil choice change depending on where I’m growing my boston fern: Significantly. A fern in a hanging basket dries out twice as fast as one in a pot — it needs higher moisture retention and less perlite. An outdoor garden bed fern needs almost no drainage amendment at all, just high organic matter. An indoor pot fern needs the most careful balance of the three. One soil recipe doesn’t fit all three situations, and most guides treat it as if it does.
- Why does my boston fern look underfed even when I’m fertilizing regularly?Probably pH drift. Boston ferns need acidic soil at pH 5.0–5.5, but most urban tap water runs alkaline at around 7.0–7.5. Every watering nudges the soil pH upward. Over months, even a perfectly acidic starting mix drifts toward neutral, causing nutrient lockout — the fertilizer is present but the plant can’t access it. This is one of the most common undiagnosed boston fern problems. The fix is occasional filtered or rainwater, or a dilute acidic amendment like a small amount of white vinegar in your watering can (about one teaspoon per gallon).
Read also: our favorite pink indoor plants, Philodendron Micans care, and Alocasia Pink Dragon care and Best soil for tradescantia bubblegum
What Boston Fern Actually Needs in a Soil Mix
Boston ferns in the wild grow on forest floors — in deep organic matter, consistent moisture, dappled light, and naturally acidic soil from decomposing leaf litter. They’ve never lived in the kind of dense, mineral-heavy, near-neutral potting mixes that line garden center shelves. Understanding this context makes every soil decision easier.
There are three non-negotiables for any boston fern mix.
High organic content. Ferns need rich, humus-like soil that mimics forest floor material. Organic matter retains moisture evenly, feeds the dense root system slowly, and maintains the slightly acidic pH the plant needs. Mixes with low organic content dry too fast, compact quickly, and don’t buffer pH well.
Moisture retention without waterlogging. This is the balance that trips most growers. Boston ferns need consistently moist soil — not wet, not dry, moist. A mix that drains too freely will have you watering constantly and the plant will still struggle. A mix that holds too much water will rot the roots. The goal is a mix that holds moisture evenly for two to three days and then signals clearly that it’s ready for more water.
Slightly acidic pH, 5.0–5.5. This is more critical for boston ferns than for most houseplants. At the wrong pH, nutrients become chemically unavailable even when they’re physically present in the soil. A plant that looks chronically underfed despite regular fertilizing is often suffering from pH-driven nutrient lockout, not actual deficiency.
PRO TIP: boston ferns tolerate being slightly root bound. They don’t need frequent repotting — in fact, unnecessarily disturbing the root system causes more problems than it solves. When you do repot, go up only one pot size and focus on refreshing the soil rather than giving the roots more room. Soil choice at that moment matters more than timing.
Read also: Best soil and fertilizer for English Ivy
Our DIY Boston Fern Soil Mix — Three Versions

This is how we actually mix soil for our boston ferns, adjusted for growing context. The base formula is consistent; the ratios shift depending on where the plant is living.
Base ingredients: coconut coir, perlite, worm castings, sulfur or acidic amendment.
- Coir is what we use across all our plants — it’s sustainable, doesn’t compact the way peat does, and holds moisture evenly. The one honest tradeoff for boston ferns specifically: coir runs close to neutral pH (around 6.0–6.8), which is higher than the 5.0–5.5 range boston ferns actually want.
- We acidify the mix by adding a small amount of granular sulfur or by watering periodically with slightly acidified water (one teaspoon of white vinegar per gallon). It takes one extra step but it’s worth it, and it keeps us consistent with how we mix soil for everything else in the house.
Indoor pot formula: 45% coconut coir / 35% perlite / 20% worm castings, plus acidifying amendment. The higher perlite accounts for the humidifier effect — uneven drying means the middle of the pot stays wet longer than you’d expect, and the extra drainage prevents that from becoming a root rot problem.
Hanging basket formula: 55% coconut coir / 25% perlite / 20% worm castings, plus acidifying amendment. Baskets dry much faster from all sides. More coir holds moisture longer and reduces how frequently you need to water.
Outdoor garden bed formula: No perlite needed. Work coconut coir and compost into the existing soil — roughly 40% amendment to 60% native soil — focusing on organic content rather than drainage. Outdoor soil has natural structure; what outdoor ferns actually lack is organic matter and moisture retention.
Cost: a batch large enough for several repots runs us around $20–30 in materials. Affiliate links: coir brick, perlite, worm castings, granular sulfur.
Signs Your Boston Fern Needs Better Soil
If your fern is showing any of these symptoms and the usual care adjustments aren’t helping, soil is worth investigating before anything else.
Yellowing fronds despite correct watering. This is the classic sign of pH-driven nutrient lockout. The plant looks hungry because it is hungry — just not for more fertilizer. Check pH if you can, or try a round of acidified water and see if new growth improves.
Brown tips even with good humidity. If you’re running a humidifier and tips are still browning, look at the soil. Compacted, waterlogged, or overly alkaline soil causes tip burn that mimics low humidity symptoms.
Soil staying wet four or more days after watering. Healthy, well-structured boston fern soil should cycle through moisture in two to three days. If it’s staying wet longer, drainage has failed — either the mix is wrong, the pot has no drainage, or the soil has compacted.
Soil pulling from the pot edges. Visible shrinkage means the peat has compacted and hydrophobia is setting in. Time to refresh or repot.
Plant declining after a recent repot. If the fern was healthy before repotting and declined after, the new mix is the most likely culprit. Check whether it’s staying too wet or too dry, and whether the pH of the new mix is appropriate.
how to repot Boston fern

Signs it’s time to repot:
Roots are visibly circling the drainage holes or mounding on the soil surface. Water runs straight through the pot without being absorbed — a sign the root mass has become so dense there’s no soil left to hold moisture. Growth has slowed noticeably despite good light and consistent feeding. Or the soil has visibly compacted and pulled from the pot edges, which means it needs refreshing regardless of root crowding.
Signs it’s not time to repot:
The plant looks slightly snug but is still producing new fronds. Ferns push new growth from their center and tolerate a tight root zone well. If it’s growing, leave it alone.
How to repot:
- Go up only one pot size — two inches wider in diameter at most. Boston ferns in oversized pots sit in more soil than their roots can drink from, which keeps the outer soil wet and invites root rot. Choose a pot with drainage holes; no exceptions for this plant.
- Remove the fern from its current pot, shake off as much of the old soil as you can without being aggressive about it, and check the roots. Healthy roots are white or light tan. Dark, mushy roots are rotted and should be trimmed back with clean scissors before repotting.
- Fill the new pot with fresh mix — our DIY formula above, or one of the pre-made options — set the fern in at the same depth it was sitting before, and fill in around the sides. Don’t pack it down.
- Water thoroughly immediately after repotting, then move the plant to a slightly shadier, higher-humidity spot for one to two weeks while it recovers. Don’t fertilize for three weeks — fresh soil has enough nutrition and the roots need time to establish before being pushed to feed.
On pot material:
- we use plastic pots for our indoor boston ferns. Terracotta wicks moisture away from the root zone faster than ferns like, and in a dry Brooklyn apartment that means more frequent watering and higher stress on the plant.
- Plastic holds moisture more evenly. For hanging baskets, lined wire baskets with coco liner work well — the coco liner retains moisture while still allowing airflow from all sides. → Check our favorite pots on Amazon
Mid-season repotting: if your fern is declining in clearly degraded soil and you can’t wait until spring, repot carefully — rinse the roots gently, use fresh mix, keep it in high humidity out of direct light for a week, and hold off on fertilizing. It’s riskier than spring repotting but often worth it if the soil has genuinely failed.
Best Fertilizer for Boston Fern
What Boston Ferns Need From Fertilizer
Boston ferns are heavy feeders during the growing season — more demanding than most common houseplants. In spring and summer, they’re pushing out new fronds continuously and the nutrient demand is real.
- Underfeeding shows up as pale, washed-out fronds and small, weak new growth.
- Overfeeding shows up as brown crispy tips and white salt crust on the soil surface.
A balanced NPK formula — 20-20-20 or close to it — is what we use and recommend during active growth. Avoid nitrogen-heavy formulas; excess nitrogen pushes rapid soft growth that’s prone to tip burn and doesn’t actually make the plant healthier. The goal is steady, balanced nutrition that supports consistent frond development.
Iron matters specifically for frond color. Boston ferns that look slightly washed out or pale green rather than deep green are often iron-deficient, which can be caused either by true deficiency or by pH-driven lockout preventing iron uptake. A fertilizer with micronutrients including iron is worth the small premium.
Frequency: every four weeks or so during spring and summer. Every six to eight weeks in early fall. Stop entirely in winter — feeding a dormant or slow-growing fern in low winter light causes salt accumulation with no growth benefit.
Always fertilize into moist soil. Dry soil plus concentrated fertilizer is a direct route to root burn.
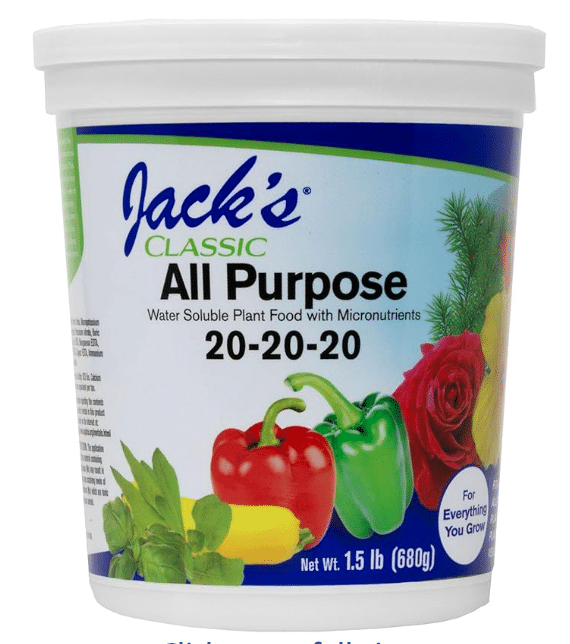
Jack’s Classic All Purpose 20-20-20 — Our versatily favorite
This is what we use on our boston ferns. Jack’s 20-20-20 is a water-soluble powder that dissolves completely and cleanly, delivers a genuinely balanced NPK, and includes a solid micronutrient profile. We use it at half the recommended dose — the label instructions are generous and boston ferns don’t need full strength. At half dose every two weeks during growing season, our ferns stay deeply green and push new fronds consistently. Cost-effective for a multi-plant household.
Pros: Perfectly balanced NPK, complete micronutrients, dissolves cleanly, cost-effective, reliable.
Cons: Powder format requires mixing — not quite as grab-and-go as a liquid. Need to dilute carefully.
Best for: Indoor boston ferns in pots.

2. Miracle-Gro Water Soluble All Purpose Plant Food (20-20-20) — Best Accessibility Pick
The Miracle-Gro 20-20-20 does the job reliably and it’s available everywhere. We use it at half strength, same as Jack’s. The main difference between the two is that Jack’s has a slightly more complete micronutrient profile — but for most growers, Miracle-Gro will produce indistinguishable results at a lower per-application cost given how widely it’s sold. If you already have it in the house for other plants, use it on your boston fern.
Pros: Widely available, affordable, reliable, familiar brand.
Cons: Micronutrient profile not as complete as Jack’s. Same powder-mixing requirement.
Best for: Growers who want a dependable all-purpose fertilizer they can find anywhere.
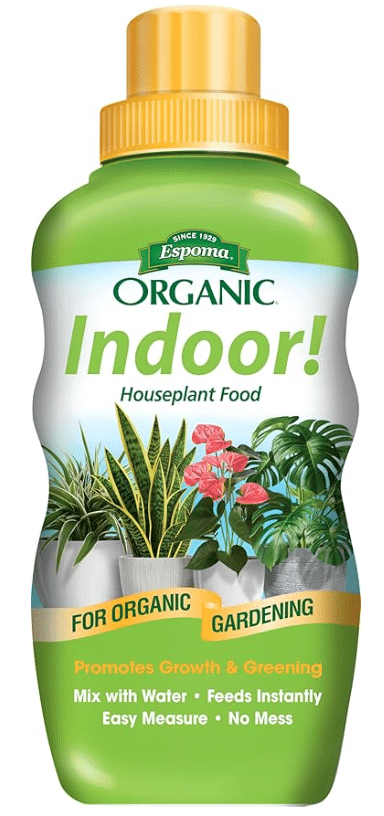
Espoma Organic Liquid Seaweed — Best Organic Option
For growers who want to feed organically, Espoma’s liquid seaweed is our pick. It’s gentle enough that it’s very hard to over-apply, it has a mild acidifying effect on the soil which helps counteract pH drift over time, and the seaweed extract provides trace minerals that support overall plant health. The NPK numbers are low compared to synthetic options — this is a gentle, supplemental feed rather than a heavy-duty nutrition delivery. We use it in combination with the worm castings in our DIY mix rather than as a standalone fertilizer.
Pros: Organic, low burn risk, mild acidifying effect, good trace mineral content.
Cons: Low NPK — not strong enough as a standalone fertilizer for a heavy feeder like boston fern during peak growing season. Best used as a supplement.
Best for: Organic growers, or as a complement to a worm casting-based soil mix
Fertilizer Flushing — When and How
Boston ferns accumulate fertilizer salts faster than most houseplants because you’re feeding them more frequently. Salt buildup is one of the most common causes of chronic tip browning that people misdiagnose as a humidity problem.
What it looks like: a white or pale yellow crust forming on the soil surface, brown tips that spread inward rather than just sitting at the very tip, and a plant that seems to decline despite consistent feeding.
How to flush: take the pot to a sink or outside and water slowly and thoroughly with plain water — no fertilizer — until water runs freely from the drainage holes. Then keep going. You want to pass roughly three to four times the pot’s volume of water through the soil, slowly enough that it’s actually absorbing rather than just running straight through. Let it drain completely before returning the pot to its spot. Don’t let it sit in the runoff.
How often: every six to eight weeks during growing season as a preventive measure, even if you don’t see visible salt buildup. If you see a white crust on the soil surface, flush immediately.
After flushing: wait one week before resuming fertilizer, and when you do, start back at half strength rather than full dose. We’ve found this reset approach keeps our ferns consistently healthier than continuous feeding without periodic flushing.
What are boston fern soil requirements?
Boston ferns need three things from their soil: high organic content that mimics forest floor conditions, consistent moisture retention without waterlogging, and slightly acidic pH between 5.0 and 5.5. Standard potting mixes fail on pH and often on organic content. Coir-based mixes with perlite amendment and an acidifying step are our preferred approach.
Do boston ferns like to be root bound?
Boston ferns tolerate being slightly root bound and don’t need frequent repotting. We repot only when the soil has clearly degraded — compacting, shedding water, or pulling from pot edges — or when roots are visibly circling the drainage holes. When you do repot, go up only one pot size and focus on refreshing the soil rather than giving the roots significantly more room.
How often should I fertilize my boston fern?
Every two weeks during spring and summer. Reduce to every six to eight weeks in early fall. Stop entirely in winter. Always fertilize into moist soil and flush the pot with plain water every six to eight weeks to prevent salt buildup — boston ferns accumulate fertilizer salts faster than most plants because of the feeding frequency.
Why are my boston fern fronds turning yellow even though I’m fertilizing?
Most likely pH drift causing nutrient lockout. Boston ferns need pH 5.0–5.5, but urban tap water is typically alkaline — around 7.0–7.5. Regular watering gradually raises your soil pH over the season, eventually reaching a point where nutrients are chemically unavailable even when they’re physically present. The plant looks underfed because it can’t access what’s in the soil. Try watering with filtered water or add a teaspoon of white vinegar per gallon to your watering can for a month and watch whether new growth improves.